Passing From Login Screen to Main Screen in Javafx

![]()
JavaFX: 3 Means of Passing Information Between Scenes!
One of the most common issues that raises when developing a desktop awarding with JavaFX is "How can I pass this user input from scene A to scene B?", while you can always rely on text files or even databases, these may not exist the most suitable arroyo.
The goal of this tutorial is to teach you three different ways you can pass information from one scene to another. Before we dive deep on that, let'due south first make a few assumptions:
- We have a JavaFX app with two fxml files, SceneA and SceneB, each with its ain controller, and we want to pass data from A to B.
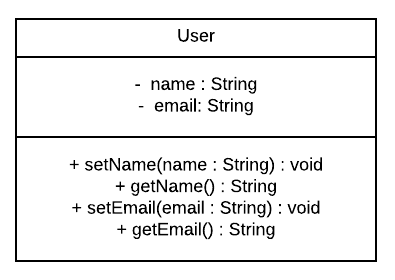
- Nosotros accept a class that encapsulates the data we desire. For the sake of this post, permit's say this class is divers equally follows:
- We have a method named
sendDatain the SceneAController where we gather the data. This method is called upon amouseClickedevent - We take a method named
receiveDatain the SceneBController where we populate an example of the user form with the information we receive. This method is chosen upon amouseClickedevent
That'due south all 👍! Now about those methods...
Start Method: Using the UserData office
In JavaFX, all the classes that inherit from the class Node have the following methods: setUserData(Object) and getUserData(). According to the official documentation, these methods permit usa to adhere an capricious object to a node for later utilize. I think you can see how powerful is that! Although nosotros tin can use any node for this purpose, I recommend yous utilize the stage itself, since it'southward the same no matter the scene.
In order to use this method, in the sendData function, follow these steps:
- Save the data in an instance of the user grade
- Grab the node representing the button from the
upshotobject - Get the instance of the phase from the node and close it
- Load the scene through the
FXMLLoaderclass - Pass the information to the phase using the
setUserDataoffice - Create a new scene and laissez passer it to the phase
- Make the phase visible again
The sendData part should look something similar this:
In the receiveData function the only thing nosotros have to practise is:
- Get the example of the phase just like before
- Recover the object using the
getUserDatarole - Employ the information as you see fit
Hence, the receiveData office should expect something like this:
And just like that nosotros take managed to pass information between the two scenes, ¡Bravo 🎉!. This arroyo is very useful when we need a quick way to transport data back and forth but, what if we need to laissez passer more than than one object? We will meet how to overcome this in the next section.
Second Method: Manually Setting the Controllers
Commonly when nosotros create our fxml files, the IDE automatically creates a controller for it and link them together using the following property in the root tag of the fxml file:
fx:controller="<parcel>.Controller"
In addition, this also creates a new instance of the controller class, but if we want to pass information to a field stored in the controller, like we would in a regular class, we must create the instance manually.
In order to apply this method, we need to follow these steps:
- Remove the property we saw earlier from the
SceneB.fxmlfile - In the SceneBController, create a new aspect of type user along with its
fixandgofunction
Back in the sendData function:
- Follow the outset iii steps nosotros saw in the previous section
- Create an
FXMLLoaderobject and shop in it the result of the statementFXMLLoader.load(...) - Create a new instance of the SceneBController class and laissez passer information technology the information using the
gear upmethod you created - Use the
setControllermethod in theFXMLLoaderobject you lot created and pass it the controller instance - Use the
loadmethod and store its issue in therootobject, the rest is the same as before
The sendData office should wait something similar this:
At present in the receiveData part you tin can display the data stored in the user field, like this:
This method certain is more complex than the last ane, just now yous can pass as much objects every bit yous like between the two scenes.
3rd Method: Using a Singleton Class
Until now, nosotros have relied on the controllers for passing the information, just if we truly want to mimic the business logic we would do if we were using a database for instance, we can create a third class from which the ii controllers tin can access. In order to do that, the controllers must share the same case of the new grade, and we tin can accomplish that using the Singleton blueprint.
In that location are several means nosotros can implement this pattern, only the nigh simple one is past doing the post-obit:
- Create a class and brand its constructor individual, so new instances tin't be created
- Create a constant of the same type equally the grade and initialize it
- Create a public static function to retrieve said constant
In improver to these steps, you lot too demand to create a field of the class type yous are interested in, in this example is user, along with its set and become functions. For the sake of this tutorial, permit'south say we create a course named UserHolder and follow the steps, this would be the outcome:
Back in the sendData function:
- Follow the offset 4 steps of the commencement section
- Grab the static instance of the UserHolder class
- Laissez passer the information using the
setfunction y'all created - The remainder is the same as before
And lastly in the receiveData function, you just need to recover the object from the static case, like this:
And with a very few steps, we take managed to share information between the scenes through a singleton class. This approach is peculiarly useful when doing a configuration view, you can store in the singleton form the user's preferences and easily recover them anywhere in your program.
Final Thoughts
In this post, we learned how to pass information from a scene A to a scene B in three different ways, and we saw how we would implement this in our code equally well every bit some use case where yous might need them. I hope you have constitute this useful and want to thank yous for your time.
Until adjacent time 👋!
Passing From Login Screen to Main Screen in Javafx
DOWNLOAD HERE
Source: https://dev.to/devtony101/javafx-3-ways-of-passing-information-between-scenes-1bm8
Posted by: 1news2onlinea.blogspot.com
comment 0 comments
more_vert